


A Step-By-Step Guide on How to Concrete
25 Mar 2024
Tags:
 All of our Steel products are designed and manufactured in England

We don't just make the products here at Indoor Outdoors, we use a lot of them around our factory and garden too!
We hope this blog will bring you cool ideas for storage in your shed, making your garden beautiful and much more...
05 December 2025
01 December 2025
28 November 2025
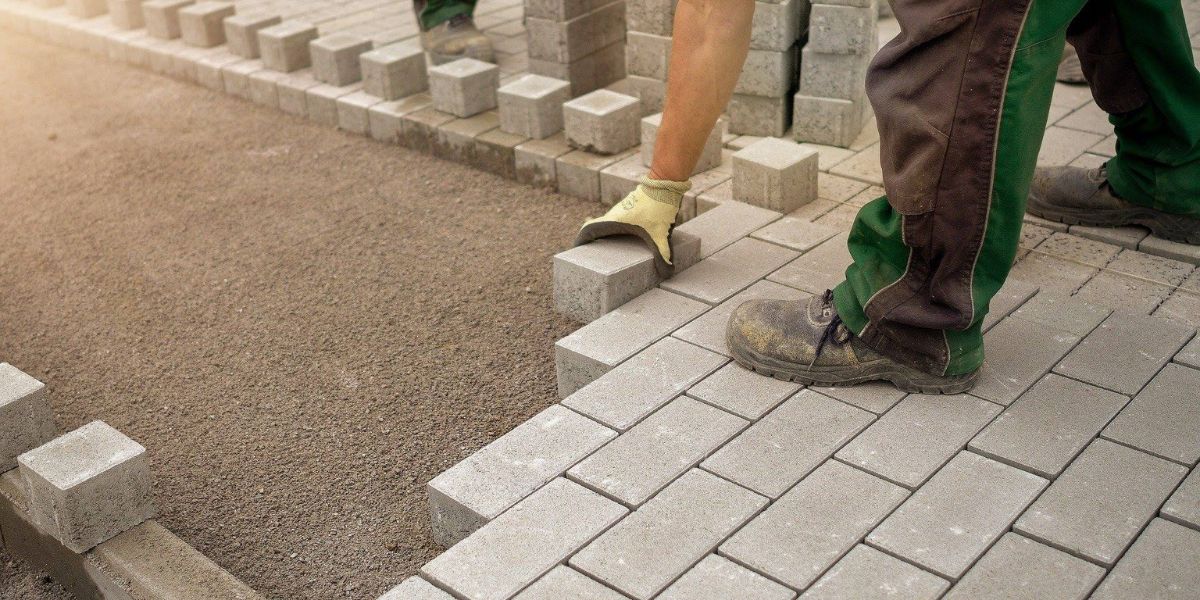
Concrete is a versatile and durable construction material widely used in the United Kingdom for various projects, from building foundations to DIY projects. If you're planning to work with concrete, it's essential to understand the process thoroughly. In this guide, we'll take you through the steps on how to concrete like a pro.
Materials You'll Need
Before you start, gather the following materials and tools:
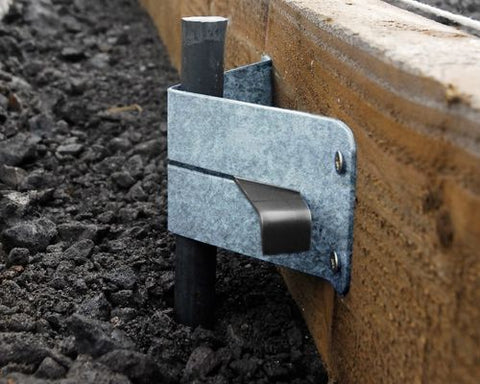
Step 1: Prepare the Site
Begin by clearing and leveling the area where you plan to pour the concrete. Remove any debris, rocks, or plants. If your project requires formwork, set it up according to your desired shape and size.
Step 2: Calculate the Mix
Follow the manufacturer's instructions on your concrete mix bag to determine the water-to-concrete ratio. Use a wheelbarrow or mixing tub to combine the mix and water. Alternatively, you can use a concrete mixer for larger projects, ensuring a consistent blend.
Step 3: Mix Thoroughly
Using a shovel or hoe, mix the concrete thoroughly until it reaches a uniform consistency. Ensure there are no dry pockets or lumps in the mix.
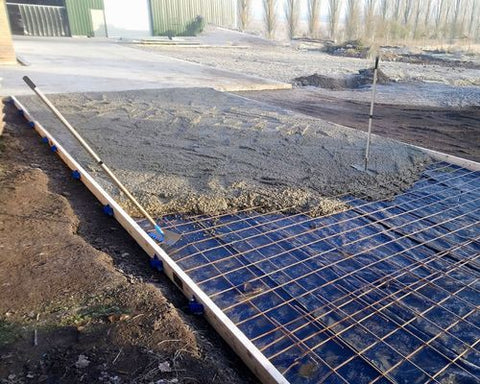
Step 4: Pour the Concrete
With your mix ready, pour it into the prepared formwork. Work quickly to prevent premature drying and inconsistencies in the concrete. If your project requires reinforcement, place it in the mix as you pour.

Step 5: Level and Screed
Use a screed board to level the concrete surface. Move the board back and forth in a sawing motion across the formwork edges to create a smooth, even surface.
Step 6: Trowel Finish
As the concrete begins to set, use trowels and floats to achieve the desired finish. You can opt for a smooth finish or various textured finishes, depending on your project's requirements.
Step 7: Curing
To ensure proper strength and durability, it's crucial to cure the concrete. Cover it with wet burlap, plastic sheeting, or a curing compound to retain moisture for at least 7 days.
Step 8: Finishing Touches
Once the concrete has fully cured, you can remove the formwork and make any final adjustments or additions, such as expansion joints or sealant.
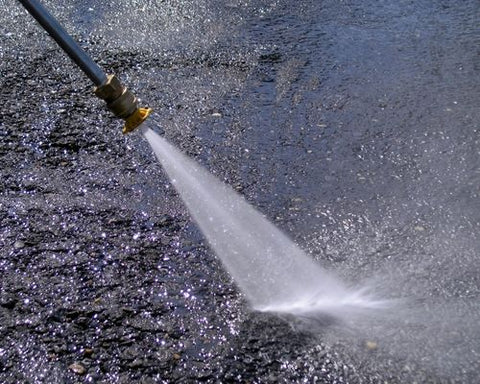
Step 9: Maintenance
Regular maintenance, such as sealing and cleaning, will help prolong the life of your concrete surface and keep it looking its best.
In conclusion, working with concrete may seem daunting at first, but with the right materials, tools, and techniques, you can successfully complete a wide range of projects. Remember to follow safety guidelines and take your time to achieve a professional finish. Whether you're constructing a patio, driveway, or a DIY project, mastering the art of concreting can be a valuable skill for any homeowner or builder in the UK.
Thanks for subscribing!
This email has been registered!